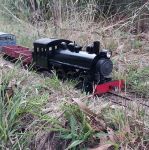
Back up this thread I promised a look at my 3-plank version when I had done it, so here it is.

- DSC_0004.JPG (211.02 KiB) Viewed 4765 times
Same basic chassis as the 2-planker, but I've changed the way I printed the body. On the first version I was unhappy with the quality of the print of the hinges, which came out a bit 'blobby', so I changed things and printed a set of hinges to stick on to a plain body. Fortunately before printing the body again I realised what the problem had been the first time. I had slowed down the print speed slightly thinking it might reduce to horizontal surface lines, because the lower speed allows the filament to stay soft for a few milli-seconds longer and blend better. The knock-on effect was also to allow the projecting hinges to stay soft and sag, which I didn't want! Anyway, printing the body plain, allowed for much easier surface preparation and it's only a couple of minutes work to stick them on, giving a much better overall finish.
Jake suggested,above, that I should produce a rake of the 2-plankers, and when I looked at my selection of spare bits, I found I had enough almost to build another wagon, so I printed the missing bits and assembled it. This is the three of them together.....

- DSC_0005.JPG (158.91 KiB) Viewed 4765 times
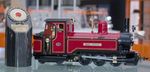
...and this is the three them plus the van and coal wagon that I produced back before Christmas.

- DSC_0006.JPG (146.59 KiB) Viewed 4765 times
Now, over on Peter Butlers thread, I slightly hijacked it talking about painting techniques, which I'm now bringing across here. So the relevant post and starting position is:
+++++++++++++++++++++++++++++++++++++++++++++++++++++++++++++++++++++++++++++++++++
Peter Butler wrote: ↑Sat Mar 02, 2019 9:27 pm
After a light sanding I spray grey primer and allow to dry. In this instance I have dry brushed with Citadel acrylic paint (Dryad Bark) to show highlights and after drying a wash coat of Agrax Earthshade to settle in the grooves.
Peter, I think I'm in need of a Butler MasterClass.
I've followed your notes, as exactly as I could, but it seems to have come out a very even dark brownish colour all over, not quite the worn wood effect I was after.
Both sprayed with Halfords grey primer.
Both given a rough dry brush of Dryad Bark .
Bottom one given a wash of Agrax Earthshade - used neat from the bottle, should it be diluted?

- DSC_00001.JPG (325.07 KiB) Viewed 4765 times
+++++++++++++++++++++++++++++++++++++++++++++++++++++++++++++++++++++++++++++++++++++++++++
What I wanted was a paler, more greyish/brown effect and I tried to mix up a khaki colour to act as the base for dry brushing onto grey undercoat, but that came out too yellow, as can be seen in the pictures of the three plank above.
Then in the wee small hours of this morning, I remembered that years ago I bought pot of Humbrol acrylic in a light brown colour, which I have never used. By some miracle I found it in the cupboard straight away, when I got up! So, I used a flat Stanley knife blade to scrape the original Citadel acrylic back to the grey primer on one of the 2-plankers,

- DSC_0001.JPG (200.92 KiB) Viewed 4765 times
and then dry brushed the Humbrol brown colour on, as before.
When dry, I washed a thin mix of dark grey ( black +white!) on to pick out the joints and grain.

- DSC_0002.JPG (188.6 KiB) Viewed 4765 times
Although not perfect, I'm reasonably happy with the result, so I'll repeat the process with the other two, in due course.
Finally, I came across a packing case drawing on Thingiverse, which fits nicely in these wagons, so I've printed one out and painted it using the same Humbrol paint, with some white in as the base colour and a wash of the same brown, neat, to find the gaps and grain.

- DSC_0009.JPG (249 KiB) Viewed 4765 times