Page 1 of 2
Another diesel for the MPLR...
Posted: Thu Aug 25, 2011 10:39 pm
by Mrs F Controller
Yes, we've finally started another project!! It came about from having to repair 'Noel' the kit-bashed Locolines 'Tiny' which broke its gearbox during filming last week. It all ended rather expensively in having to purchase a new chassis complete with motor and gearbox from Kent Garden Rail shop in St Mary Cray (don't mention Orpington he gets upset!) That worked perfectly and we finally achieved Noel working much better than it ever did before! So, now we had a spare chassis, a spare motor and also a box of assorted bits! So we have started on...... (drum roll) ...preparing the chassis for.... (another drum roll).. a Kerr Stuart 4415 (well, sort of in a manner of speaking).

It's big, and ugly and will be noisy. Yes, bring it on.. watch this space! Oh, and we will be putting it on the MPLR 'how we did it' page.
Posted: Wed Aug 31, 2011 8:20 pm
by Narrow Minded
Looks like you had a good day by the sea from the report on the website and I'm glad to hear that NOEL is fit for service again

I look forward to the diesel build!
Posted: Wed Aug 31, 2011 10:50 pm
by Mrs F Controller
Yes we had a lovely day, that was well worth the visit and Pits Productions managed a very short film for them too which they will be receiving very soon. Noel is running better than ever and had a good run round the Point Clear Tramway. The new loco is coming along nicely and if I wasn't so tired tonight will put some pics on to show the progress. It's gonna be a goody!
Posted: Sat Sep 03, 2011 10:41 pm
by Mrs F Controller
Right, still knackered but party going on next door (we haven't been invited to) and so no point in going to bed yet so will put up some pics hopefully of said diesel.
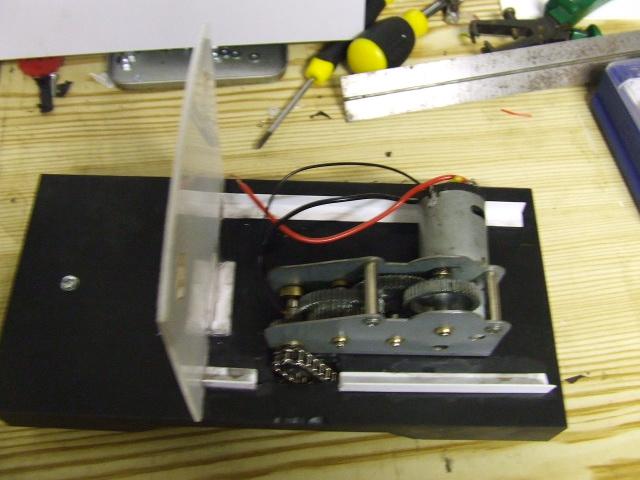
Noels old chassis and motor with a 'modified' gearbox from an old R/C tank! Mr F C decided he wanted it chain driven so that was his idea.

And he wanted me to show you his handiwork with the gearbox!
Body work starting to come along now. This is the first time we have worked with plasticard!
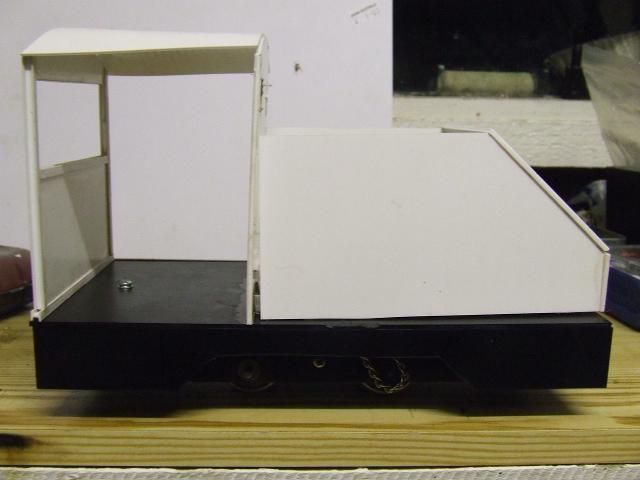
We wanted to be able to remove things easily if they went wrong so the 'bonnet' will come off.
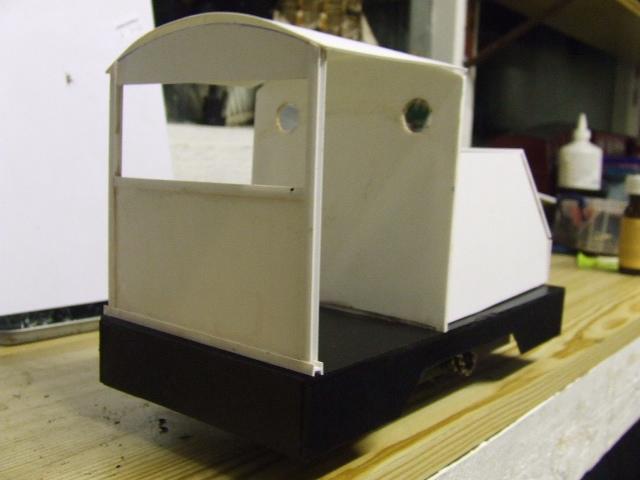
More pics to come later, I do have to work you know!
Posted: Sun Sep 04, 2011 6:40 pm
by bessytractor
I recognised the gearbox immediately, I've got stacks of Heng Long gearboxes about!
I've kept them all for just this purpose.
Posted: Tue Sep 06, 2011 11:11 pm
by Mrs F Controller
Yes you are right it is! Very pleased with it as it also makes a lovely noise, fitted the sound card from Acme Engineering, wished we'd got on ef those for 'Wynne' the railbus as it is a bit pathetic. I'm in the middle ofdoing the bodywork at the moment but now we are both back it work it's slow business. More pics to come.
Posted: Wed Sep 07, 2011 8:25 pm
by Gremlin
Coming along nicely, I knew I should have kept one of those gear boxes in the bits box..
Posted: Mon Sep 12, 2011 11:08 pm
by Mrs F Controller
Thought I'd put a few ore pics up of how it is coming along......
This is not a great photo as it was done at night but trying to show how I was getting into rivetting.

I think this one shows it a bit better. It was also nice to see it coming along so well.

And one of the front

Sorry if some of the photos are out of focus comes from taking them with a small camera at night!
Posted: Tue Sep 13, 2011 10:28 am
by Narrow Minded
That's looking great Mrs F

The detailing is excellent and really brings it to life!
How have you done the rivets?
Posted: Tue Sep 13, 2011 6:21 pm
by LMS-Jools
Lookin Brill.

Posted: Tue Sep 13, 2011 6:39 pm
by taliesin001
Very nice, love the detail. Been looking at building this for a while but as always got too much other stuff to build first!
Posted: Tue Sep 13, 2011 8:30 pm
by DolwyddelanLightRail
I do rather like the detailing! and also the chain drive, makes it look a lot different from anything else!
Posted: Wed Sep 14, 2011 8:29 am
by Mrs F Controller
Thank you for the comments chaps! I was a bit worried about the rivets I have to admit and Steve accused me of 'counting them'!!!
There's 2 different methods there. One is 'stamping' out at equal distances the 'rivet' on a thin piece of plasticard with a posi screwdriver! Then cutting them out in thin strips with a guillotine, turn it over and hey presto a strip of rivets. That way it also looks like strengthening strips of metal! Just glued on where you want. But I'll be honest I wasn't particularly happy with those cos in real life they wouldn't all be along 'battening' would they!? So I then decided to 'dobble' (a technical word that one!) some PVA from a toothpick in the appropriate places and let it dry before painting. This way you could build up as much rivet material as you wanted depending on the size of the rivets required!
The really annoying thing was to finish it off and make it look like new and then spend time weathering it so it looks old again! Aaargh!

Anyhow here is the more or less finished article, some film to come soon with it running.
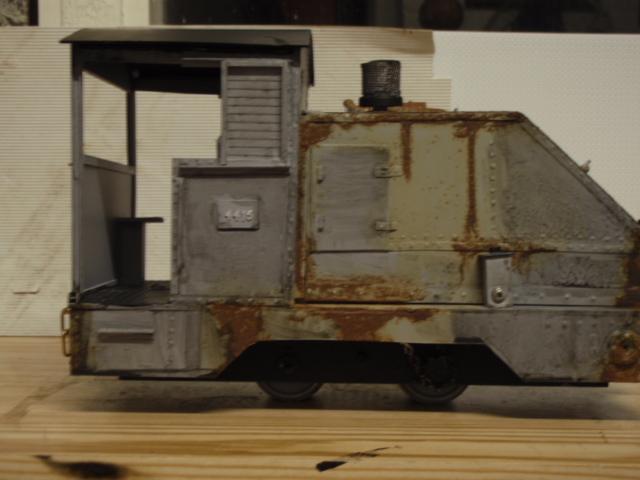

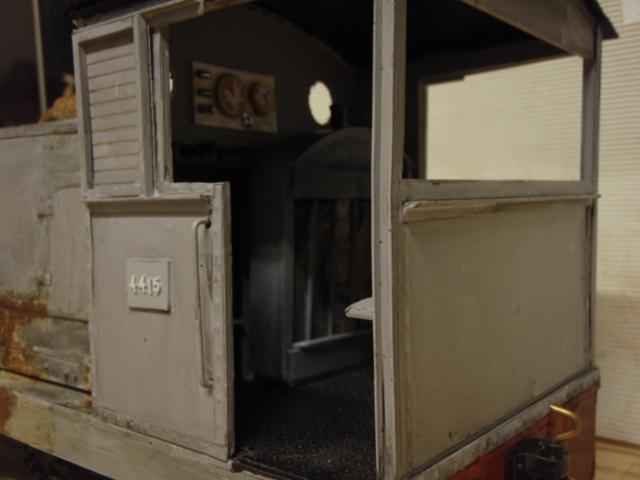
Well, we don't think it's bad for a girlie and a blind bloke???! May not be MOTY material but we made it in less than 3 weeks!
Any suggestions for the next project? By the way, this is the first thing we have made totally from scratch (ie no kits) based (loosely) on a prototype! We have named it 'Max Cole' after our friend who died last year. He was also larger than life and a bit different!
Posted: Wed Sep 14, 2011 10:05 am
by Narrow Minded
Absolutely first rate job there Mr & Mrs F C
You must be well pleased with the result, especially if it runs as well as it looks!
Now, for the next project, mmmmh - with all this talk elsewhere of Holly Berries and bad winters, I don't recall seeing an MPLR snowplough
BTW, if we cut down all the Holly bushes, would the winters improve??????????????????????
Posted: Wed Sep 14, 2011 12:23 pm
by bessytractor
it is superb! Well done, I think you should enter it into MOTY!
Posted: Wed Sep 14, 2011 12:52 pm
by dougrail
That is one cracking job chaps!!
By PVA for the fake rivets, do you mean epoxy??
Posted: Wed Sep 14, 2011 3:48 pm
by 90733
Looks brilliant
Posted: Thu Sep 15, 2011 8:55 pm
by Mrs F Controller
dougrail:58698 wrote:That is one cracking job chaps!!
By PVA for the fake rivets, do you mean epoxy??
No I mean PVA (or wood glue) you know that white glue than sticks most things (except metal) and dries clear! It is quite thick so doesn't spread much. It takes quite a time to fully dry really hard and then we painted over them.
Posted: Fri Sep 16, 2011 1:07 pm
by GTB
Mrs F Controller:58691 wrote:
Well, we don't think it's bad for a girlie and a blind bloke???! May not be MOTY material but we made it in less than 3 weeks!
A credit to both of you, even more so if that's your first major scratchbuild.
Has the team decided on the next project yet?
Regards,
Graeme
Posted: Fri Sep 16, 2011 1:28 pm
by -steves-
I think that is absolutely brill and anyone would be extremly proud of that result. me I just know I could not come up with something that good no matter how long I tried.
Superb and very well done
