Pimp my Ragleth *** Now finished! ***

What is your latest project?
ninge

Pimp my Ragleth *** Now finished! ***

Post by ninge » Sun Dec 26, 2010 11:05 pm

So, I promised to post some pictures of my other project a while ago (An Andel guard van that I've been adding a light to) but I've failed to take any pictures of that so far.. so instead here are some 'work in progress' pictures of what I've been doing to my locomotive :)

Ragleth is my first steam loco (actually my first loco full stop) and as I currently only have a single yard of track to "play" on I wanted to get some enjoyment from customising the loco.

Here she is prior to my tinkering:

Image

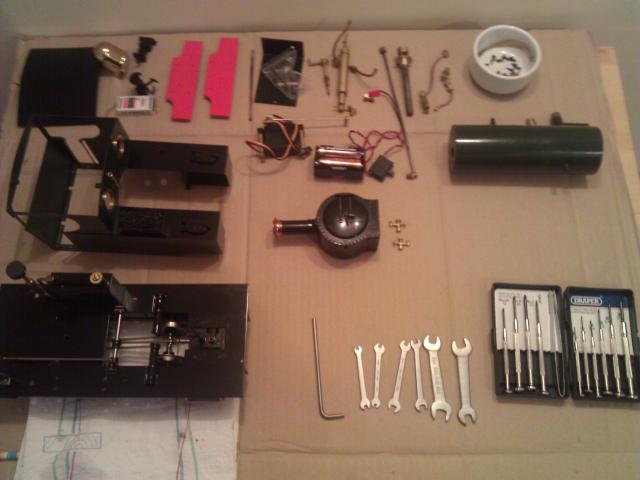
And here she lies in her component parts, ready for the fun to begin!

Image

I have no previous model engineering experience so the modifications are going to be almost entirely cosmetic to avoid totally destroying any hope of her ever running again ;)
Last edited by ninge on Wed Sep 21, 2011 1:16 pm, edited 1 time in total.

ninge

Post by ninge » Sun Dec 26, 2010 11:22 pm

First job was to remove all the boiler bands and order some new thinner ones from Roundhouse, along with some of their lamp brackets.

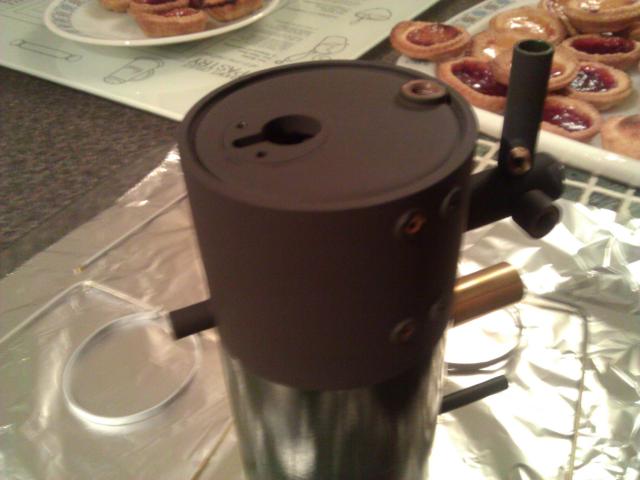
I sprayed the cab end of the boiler with some mat black car exhaust paint (high temp stuff) and baked it in the oven at 80c for 30 mins once the tasty treats you see in the background had finished cooking ;) You can also see the acid etched new boiler bands and just out of shot some shaped up lamp brackets. These will get painted green to match the boiler soon.

Image

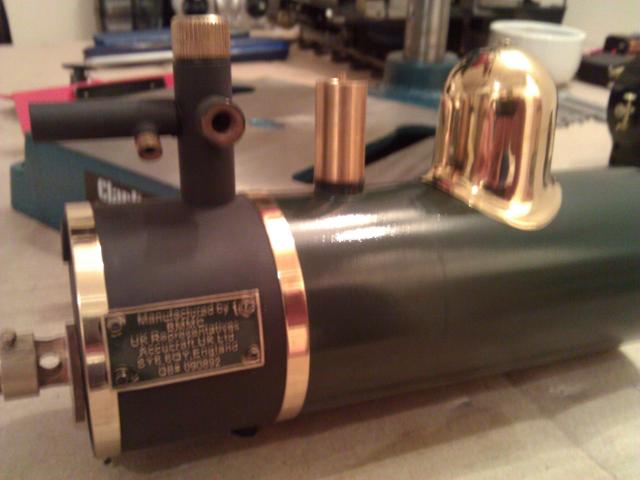
I adjusted the original brass boiler bands so that they'll fit nicely inside the cab, around each end of the new black section. This involved a little filing with a curved file to get them to fit around the pegs for the manufacturers plate and around the pole that attaches the boiler to the frame. I'm quite pleased with the results:

Image

Image

Ahead of the spraying I had to remove the bolts holding the manufacturers plate on with some needle nose pliers. Sadly I didn't have anything more suitable. This scratched the plate a bit as you can see, but that's ok as I intend to repaint it in black later anyway :)

mhlr
Retired Director
Retired Director
Posts: 4336
Joined: Sun Oct 21, 2007 8:16 pm
Location: Shropshire, England

Post by mhlr » Sun Dec 26, 2010 11:29 pm

Is the nut twirler that comes with Accucraft locos not the right size for those bolts holding the boiler manufacture plate on? They look around that size?

Looking great though, have you got 'Tag Gorton's Live Steam Workshop' book?
Image

ninge

Post by ninge » Sun Dec 26, 2010 11:34 pm

Next job was to replace the rather large pressure gauge that came with the loco with a nice little one from Acme Engineering. My parents had purchased this for me for my birthday, but sadly the thread was the wrong kind for my loco...

Image

A quick call to Mike Ousby at Acme soon sorted the problem though, it appears that some Ragleth's are shipping with different pressure gauges to others so while the one I had been sent was correct for most, it was not for mine.

I posted off both my pressure gauge and the one from Acme and received a shiny new replacement a couple of days later that fits like a glove:

Image

Excellent service from Acme - Highly recommended! :)

I'm wondering if i can cut the length of the thread down a bit to make it fit even better... any advice would be welcome!

ninge

Post by ninge » Sun Dec 26, 2010 11:37 pm

Sadly the nuts on the manufacturers plate are about half the size of all the rest and the accucraft nut twirler doesn't come close to fitting :(

All other nuts appear to be a single standard size though asside from those four.

And yes, I do have Tag's excellent book - I should probably have made it clear up top that an awful lot of what I'm doing has been inspired by the mods to the Edrig in there and from images in the many issues of Garden Rail. Both excellent resources :)

Hopefully it will all have a bit of a unique twists of my own though!

mhlr
Retired Director
Retired Director
Posts: 4336
Joined: Sun Oct 21, 2007 8:16 pm
Location: Shropshire, England

Post by mhlr » Sun Dec 26, 2010 11:39 pm

ninge:45466 wrote:I'm wondering if i can cut the length of the thread down a bit to make it fit even better... any advice would be welcome!
Yes, if you have a nut that fits that thread, run it down to the bottom, then carefully cut it down with a hacksaw. Once done, run the nut off the thread then that'll make sure the end where it's cut is free of swarf. If you don't have a nut, you can just file round the edge to smooth it off.
Image

ninge

Post by ninge » Sun Dec 26, 2010 11:49 pm

My name plates from Alan Briggs finally arrived. They took quite a while to appear, but I have to say the quality of them is excellent and worth the wait. I think I caused a bit of a stink on the 16mm yahoo group by asking if anyone else had had issues with Alan, but the plates appeared very quickly after he promised to send them and I couldn't be happier with the results!

Image

Also pictured are my works plates from Narrow Planet. These are exactly what I asked for. They're a little thinner than the ones from Alan Briggs, but aside for a spot of uneven painting the quality is great! Considering the price I paid for four pairs (numbers 1, 2, 3 and 4, well... it helps to think ahead right? :P) they were a bargain!

I'll be attaching these to her later.. there are still plenty of other jobs to do before I can get to that, but I thought I'd share this image of them.

Oh and why 'Victoria'? Well.. I needed a naming scheme for my imagined line.. and i figured if there was going to be a fat controller he probably likes cakes. So all the loco's will be named after different kinds of cake. Victoria after the sponge and more to follow ( I hope!). I've already suggested that I'm on the lookout for a little diesel to call "Sir Battenberg" ;)

Oh, and H.M. Slone & Co. LTD is an anagram of my name. I wanted the loco works to mean something to me, but didn't want to just stick my own name on the side - so this was the result. I tried all sorts of different names before settling on this one as I felt it sounded suitable.

ninge

Post by ninge » Sun Dec 26, 2010 11:54 pm

Yes, if you have a nut that fits that thread, run it down to the bottom, then carefully cut it down with a hacksaw.
Excellent thanks - a job for tomorrow then :)

ninge

Post by ninge » Mon Dec 27, 2010 12:02 am

Next up, a couple more modifications straight out of Tag's book. I added rosco lubricators and a lamp bracket to the smoke box.

Attaching these was pretty nerve wracking.. This is the first drilling I've done on the loco and I knew that if I messed up it would be tricky to rectify. Fortunately I have a vertical drill stand for my trusty hand drill and this proved to be exactly what this job needed!

Image

The bolts securing the lamp bracket in place are two of the spares that came with the loco. I ended up drilling the holes very close to the front edge of the smokebox, so this meant that there was no room to put nuts on the bolts inside as the holes as they are right up against the edge. Fortunately the bolts were quite tight fits anyway, and a bit of super glue on the ends seems to have done the trick :)

I'm still in two minds whether to paint the smokebox mat black or not.. I think this is a decision I shall leave until all else is done and I've reassembled everything,

Oh yeah, you can just see an Andel buffer stop in the pic there - A present from my other half's sister this xmas. I'll be painting that up to go at the end of my yard of track sometime soon!

ninge

Post by ninge » Mon Dec 27, 2010 12:14 am

Ok, it's getting late so last post for tonight!

I've also replaced the chopper fittings from accucraft with the standard centre buffers to match my set of Andel rolling stock (two wagons and a half finished guard's van :P)

Again, drilling was called for and I made double and triple sure everything was lined up before I put in the holes!

Image

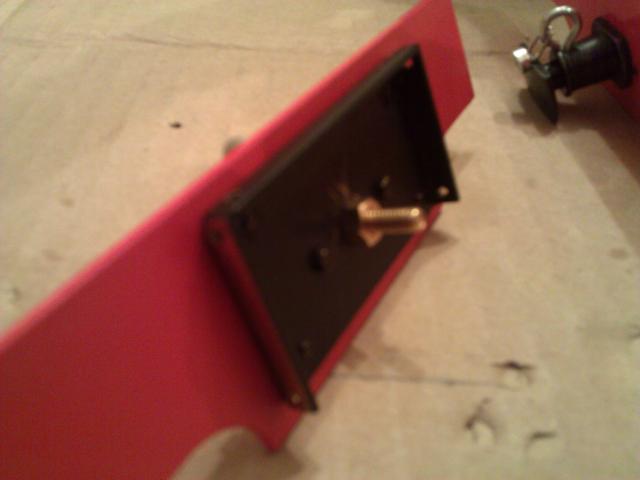
I also had to cut down the bolt on the rear buffer so that it wouldn't interfere with the battery box for the RC gear:

Image

Image

I picked these sprung buffers up from Brandbright along with a bunch of extra 10BA nuts and bolts and some safety chains just before Christmas. I've replaced the standard hook fittings with some small rings and have fitted some of Timpton Electronics excellent magnetic couplers. I got 10 pairs of these from Santa and plan to fit all my rolling stock with these:

Image

This shot makes the buffers appear much closer together than they will be when in use due to the angle that the buffer beams are resting at - don't worry, There'll be plenty of give for even tight radius corners :)

Sir haydn

Post by Sir haydn » Mon Dec 27, 2010 9:22 am

There are a few people in our club with those magnetic couplings. thing is they cant cope with much strain. any more than 4 standard brandbright open wagons and they uncouple at the slightest flinch. I think its one of those things that seemed like a good idea at the time.

LMS-Jools

Post by LMS-Jools » Mon Dec 27, 2010 10:08 am

All looking most excellent. Nice work. 8)

SLRmidge

Post by SLRmidge » Mon Dec 27, 2010 10:17 am

Looking great :D

ninge

Post by ninge » Mon Dec 27, 2010 11:35 am

Thanks for the nice comments :) Slightly disappointed to hear that the couplers might not be as good as I was hoping.. guess I'll have to wait and see on how they behave. I'm not planning on having lots of stock - I currently have 3 wagons (2 built, 1 half built) and 2 brandbright wooden coach kits which Santa brought. So hopefully they magnets will be good enough for those.

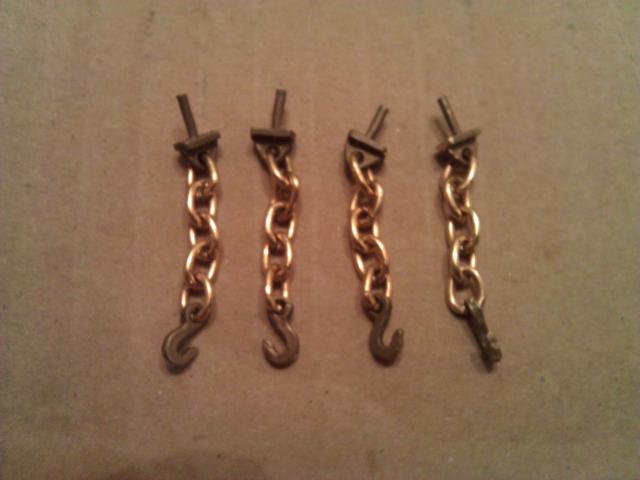
This morning I spent a fun half hour putting together my brandbright safety chains - I will drill the buffer beams and fit these later on:

Image

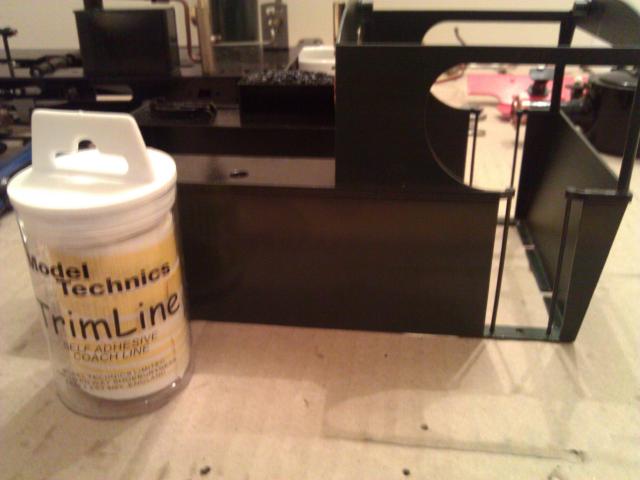
Today I'm going to be using some trimline tape to experiment with lining styles for the bodywork. I have a lining pen I bought at Warwickshire Model Engineering show earlier in the year that I'm going to use to paint on the lines.. but first i need to figure out where they are going to go!

Image

User avatar
Dr. Bond of the DVLR
Retired Director
Retired Director
Posts: 4529
Joined: Tue Jun 09, 2009 9:43 pm
Location: Suffolk
Contact:

Post by Dr. Bond of the DVLR » Mon Dec 27, 2010 11:44 am

Excellent, inspiring stuff! Lovely to see the new ragleth receiving the "edrig" treatment!
Image
The railway which people forgot
(to build)

ninge

Post by ninge » Mon Dec 27, 2010 5:53 pm

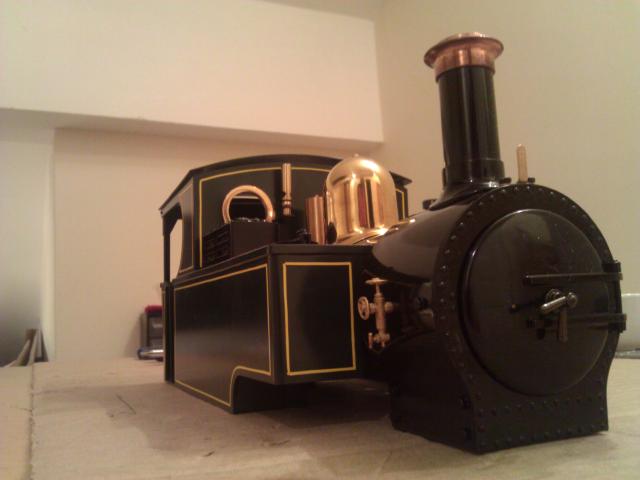
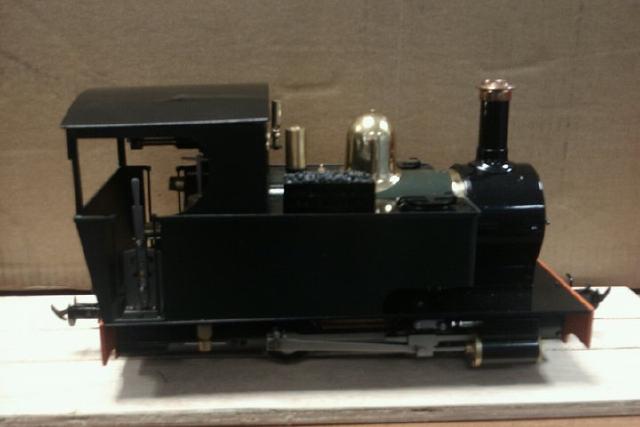
A couple of hours and half a roll of Trimline tape later...

Image

Image

Image

I'm really surprised by how well this came out! The ends need a little trimming and Tag's live steam workshop book recommends a blob of paint on each join to secure it in place... but other than that it looks great and I think I'm happy with the layout enough to commit it to painted lines! If anyone thinks anything looks a bit off please let me know though :)

The Trimline tape was really easy to put on, peels off with no problem, can be pushed around with a thumbnail or finger to adjust to curves etc - really easy to work with. My other half reckons i should forget using the lining pen and just leave this on. I'm half tempted! :D

I used about half a roll for the full loco - about 6 quid for a roll. Well worth doing this if you've got half a mind!

DolwyddelanLightRail

Post by DolwyddelanLightRail » Mon Dec 27, 2010 5:58 pm

:shock: I'm now tempted to get some now and possibly do pheonix out in white maybe! That looks great!
User avatar
Dr. Bond of the DVLR
Retired Director
Retired Director
Posts: 4529
Joined: Tue Jun 09, 2009 9:43 pm
Location: Suffolk
Contact:

Post by Dr. Bond of the DVLR » Mon Dec 27, 2010 5:58 pm

coor that does look the business!
Image
The railway which people forgot
(to build)

ninge

Post by ninge » Mon Dec 27, 2010 8:05 pm

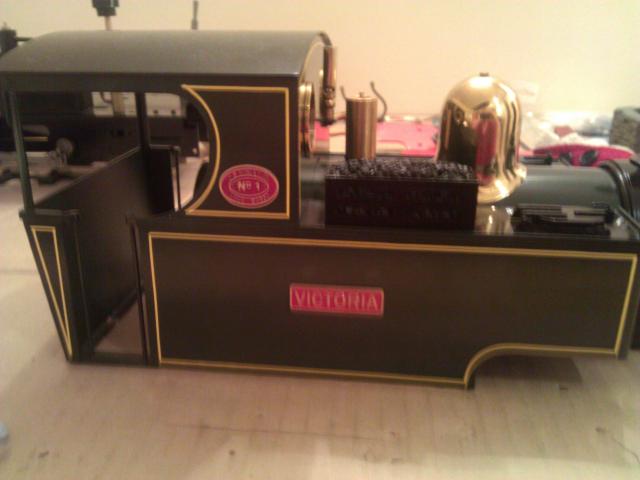
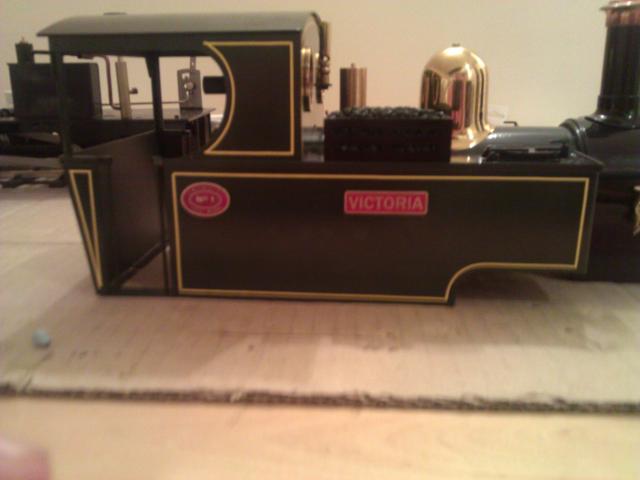
Been playing with some placements for my name plates and workers plates, I'm not really sure I'm happy with any of these.. maybe the last one? They're just blu-tac'd on for now so I can get a feel for where they should go...

Image

Image

Image

Image

The works plates seem a to be the ones that I'm struggling with - they looked good on the sides of the cab before i added the lines but now they dont really fit their except at the top or bottom (see first pic) not really sure where best to put them now...

DolwyddelanLightRail

Post by DolwyddelanLightRail » Mon Dec 27, 2010 8:07 pm

I say either the top or bottom photo's work the best really. can't decided between them though!

Post Reply

Who is online

Users browsing this forum: No registered users and 13 guests