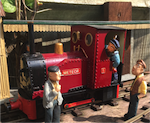

I think she's now ready for the primer.......
The spectacle plate has now had its beading applied (1.8mm half-round brass wire) and rings around the spectacles themselves (2mm brass wire, soldered on and then filed flat). Of course, my 75W soldering iron decided to pack up and so had to do it with my 50W iron which made soldering on to the plate a bit more interesting ...... (a ten @$&#$£-it per minute job as opposed to the more usual five @$&#$£-it per minute job!)
- IMG_6242.JPG (78.15 KiB) Viewed 11104 times
The safety valve was cobbled together from some scraps of brass tube, a self-tapping screw and some brass shim - mounted on the inverted bottom of the old chimney. Not yet fixed into place as I want to paint it separately before installing it into place.
- IMG_6244.JPG (100 KiB) Viewed 11104 times
I've replaced the Otto chunky chimney with something a bit slimmer. Decided not to go for the cut-down chimney which No.3 has - which was a replacement to its earlier taller chimney. Mine owes its origins to a felt tip pen tube and some brass wire soldered to a strip of brass and filed into a collar. Will have to paint it brass colour as there's too much solder visible for it to be polished-up.
- IMG_6225.JPG (53.45 KiB) Viewed 11104 times
The tank filler is, as you'd expect, a bit of plastic pen barrel plus a few bits of plasticard, some Cambrian rivet heads and a small piece of brass rod. Hopefully will look more realistic once it's had a couple of coats of paint.
- IMG_6223.JPG (60.18 KiB) Viewed 11104 times
The firebox door has been hinged with a piece of brass rod, so I'll be able to adjust the volume of the sound card by opening and closing the door

- IMG_6233.JPG (105.42 KiB) Viewed 11104 times
- IMG_6236.JPG (88.13 KiB) Viewed 11104 times
She's now taking shape. I'll make the sandboxes and spray them separately, as they will be fixed to the running plate.
- IMG_6239.JPG (98.37 KiB) Viewed 11104 times
After a couple of coats of Halfords rattle can grey primer, I'll be able to do some rubbing down and probably a bit more filling, and a bit more rubbing down.
- IMG_6231.JPG (92.41 KiB) Viewed 11104 times
And then, should be able to apply a few more rivets.
- IMG_6240.JPG (95.58 KiB) Viewed 11104 times
Then she'll be ready for her final coat - before I start adding the final details like pipework etc.
Rik