Page 23 of 187
Posted: Tue Jun 16, 2015 10:25 pm
by DickH
Perhaps one of the wives don't drink?? They are obviously invited also.
Posted: Wed Jun 17, 2015 12:54 am
by Big Jim
I'm up for that Dick.
Thanks for the invite, I look forwards to finally meeting you.
Posted: Wed Jun 17, 2015 9:10 am
by DickH
Lets make it happen - only commitment I've got in the next few weeks is Sunday July 12th and 17th - 20th when we are off to Scotland to watch the British Open - lets keep an eye on the weather, any day during week or weekend and make an afternoon/evening of it.
Posted: Wed Jun 17, 2015 9:11 am
by DickH
I've got plenty of rolling stock so just bring the trains - unless you want to run your rolling stock - as Peter knows I'm SM32 like you both.
Posted: Wed Jun 17, 2015 7:00 pm
by Peter Butler
During the running evening with Big Jim, my Billy 'Lady Andrea' developed a bit of a limp! A loose linkage on the reverser was discovered (by Jim) and after tightening, the valve timing was thought to be out.
My model making is more art than engineering so I have to admit I felt a little unsure of tackling this project but after consulting the assembly booklets which came with the loco I had a go!
Those wonderful people at Roundhouse give such detailed instructions and diagrams even I managed to get it right first time and she now steams better than ever!
Thanks too to Big Jim for identifying the problem.
Posted: Wed Jun 17, 2015 8:35 pm
by Big Jim
No problems Peter glad to be of help. Might be worth keeping an eye on those nuts and maybe use a bit of thread lock on them if the problem persists.
Glad to hear 'Lady Andrea' is back in fine fettle.
Posted: Wed Jun 24, 2015 10:36 pm
by Peter Butler
As the weather is fine, for now, I have been laying more rocks to form the backdrop to my quarry scene.... no pictures at the moment but will follow when I'm a bit more advanced. This area will also include new planting which I have decided needs a re-think as some areas are completely hidden from view, and they are the ones I like best!
However, I have given my little people an opportunity to tidy up the railway by supplying a skip..... they have been busy and put all the scrap ready for the lorry to take it away.


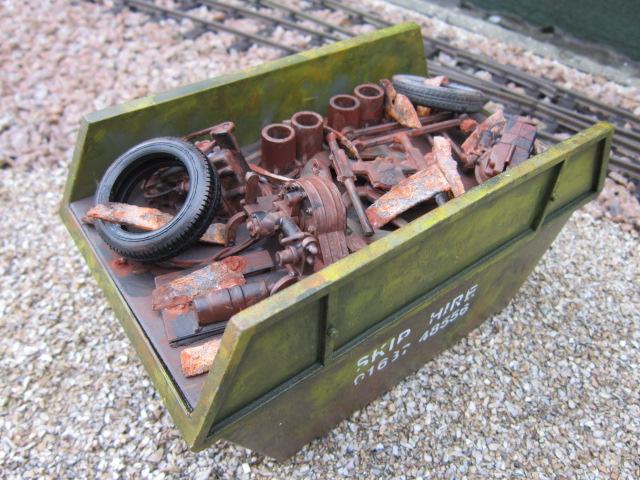
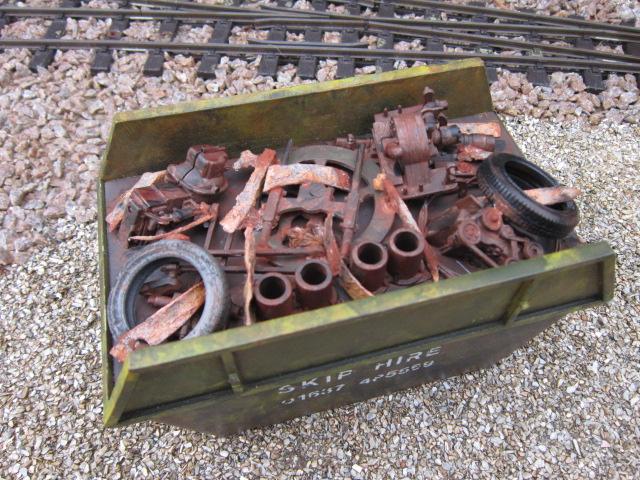
The telephone number is just a random selection so sincere apologies to anyone who has such a number.
Posted: Wed Jun 24, 2015 11:31 pm
by DickH
As always very impressive!
Posted: Thu Jun 25, 2015 7:50 am
by ge_rik
Brilliant as ever, Peter. That rusty stuff looks spot-on and the skip itself looks well (ab)used.
Rik
Posted: Thu Jun 25, 2015 8:25 am
by Big Jim
Nice little model that Peter.
Have you sorted out the problems with 'Lady Andrea' yet?
Posted: Thu Jun 25, 2015 7:12 pm
by Peter Butler
ge_rik:111682 wrote:That rusty stuff looks spot-on and the skip itself looks well (ab)used.
Rik
Thanks Rik, the rusty stuff is in fact real rust.... I put some steel scraps in water and left them for a couple of weeks. The resulting lumps were then put on top of other assorted plastic junk and sprayed with matt varnish.
The skip itself was a purchase from The Works where it was sold as a holder for pencils, erasers etc....
Posted: Thu Jun 25, 2015 7:14 pm
by Peter Butler
Big Jim:111683 wrote:
Have you sorted out the problems with 'Lady Andrea' yet?
Lady Andrea is running very nicely thank you Jim. She went on an excursion during the weekend to a 45mm gauge line where she showed those track powered thingies how to do it properly!!!!!
Posted: Thu Jun 25, 2015 8:14 pm
by Peter Butler
Following on from my previous posting when I said I was having thoughts about my planting....... drastic measures have been taken and several established plants have been re-sited so that new vistas are opened up.
It seems some plants become so familiar that we don't notice how intrusive they become. I only just realised how little of my railway I could actually see from certain viewpoints and they are the ones which give some of the best overall impression.
The rear of my railway, above the quarry, was shouting out for planting so I decided to move some of the plants to new sites. Whether they will survive the move only time will tell!
I know they have to be well watered, so I'll let you know!


Posted: Thu Jun 25, 2015 8:21 pm
by ge_rik
I really like your landscaping, Peter. Personally, I like the way vegetation grows up to obscure the railway so that you get occasional glimpses of the rolling stock as it wends through the landscape. I see you've got some conifers adjacent to the track, I think they'll grow up nicely to achieve this effect.
Rik
Posted: Thu Jun 25, 2015 9:05 pm
by Soar Valley Light
Hi Peter,
I think your efforts have paid dividends. The views in the photos are interesting and full character. I love that inclined plane. As Rik rightly points out, the confers look good and will grow to give ever changing aspects, that's one of the joys of a real railway in a real landscape. At the same time it can be one of the chores if gardening isn't your bag.
I hope to try some bonsai on trees when I (eventually) get my line out of the ground. I'm not sure how successful it would be with conifers. I've bought a book on the subject but not started reading it yet - planting out is not that close for me at the moment!
Some of your plants seem to be what I've heard experienced gardeners refer to as 'ground cover', meaning it spreads like wildfire and stifles all in it's path. It's grand stuff for weed control and quick greenery but does need some robust trimming on a regular basis (maybe a couple of times a year).
Please keep the pictures coming, your line is a real joy to admire.
Andrew
Posted: Thu Jun 25, 2015 10:05 pm
by Peter Butler
The conifers are there for just that reason, to create scenic breaks and some visual blocks. Tall plants at the front of the railway cause too much of a problem when trying to view some of the more interesting aspects of the line. Remember I am at eye level when the line leaves the shed so my trains disappear from view and much of the scenery is lost.
Having removed the tall plants to the rear now creates open space at the front which will be planted with 'ground cover' plants. When these spread they also act as weed repellents (I hope!) so should make maintenance simpler?
I'm sure there are many books on the subject but every situation is different. I bow to my wife's superior knowledge on this issue.
Posted: Thu Jun 25, 2015 10:19 pm
by jim@NAL
I do like your skip peter .its amazing how some plants take over a space without you realizing. I had to have a serous cut and trim of a lot of my plants this week .your line is looking very good and it looked sunny too send some Suffolk way
Posted: Sat Jun 27, 2015 11:00 pm
by Peter Butler
Soar Valley Light:111692 wrote:
I hope to try some bonsai on trees when I (eventually) get my line out of the ground. I'm not sure how successful it would be with conifers. I've bought a book on the subject but not started reading it yet - planting out is not that close for me at the moment!
Andrew
Hi Andrew, please don't mistake me for an expert on the subject because I can assure you I am not! However, I might suggest you begin your Bonsai experiments at this early stage to get the slow growing trees prepared in pots for when you need them. It might work, it might not, but you will at least have gained some experience for when the time comes to plant them out.
One useful tip I might be able to offer is to use compost in place of top soil. This makes it much easier to remove weeds as the roots don't become so embedded in the clay soil we have in this area.
Posted: Wed Jul 01, 2015 9:20 pm
by Peter Butler
Phew!!!!! firstly the day was too hot, then too wet to work outside, so I began to build my recently purchased Cain Howley engine shed.
The four cast concrete sides just stick together. I used Gorilla glue for this, although alternatives such as car body filler can be effective.
Gorilla glue works well although expands and has a tendency to push surfaces apart, I made a clamp to keep everything in place and then cut and sanded off any excess glue which squeezed through.
When set I filled any gaps with Miliput.
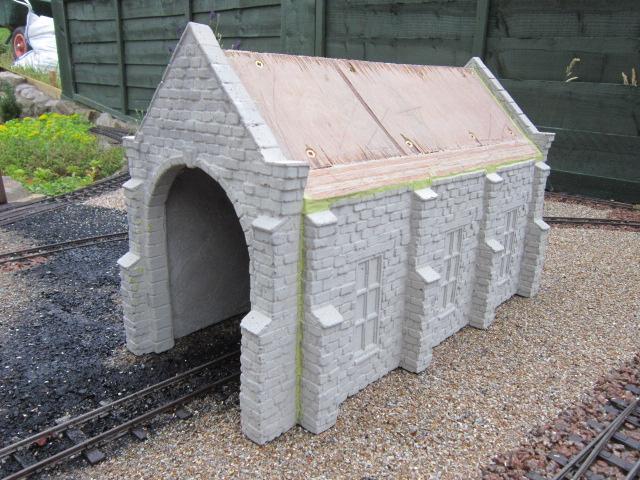

A cast corrugated effect roof is available to finish off the building but I want a slate roof on mine which will be made of Plasticard (of course!).
To support it and give extra strength to the structure I have fitted a 20mm exterior plywood triangular roof, again stuck with Gorilla glue and edged with Miliput to prevent water ingress underneath the Plasticard .
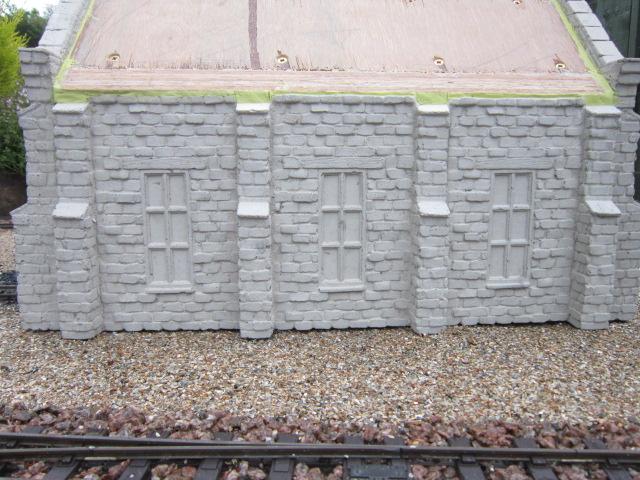
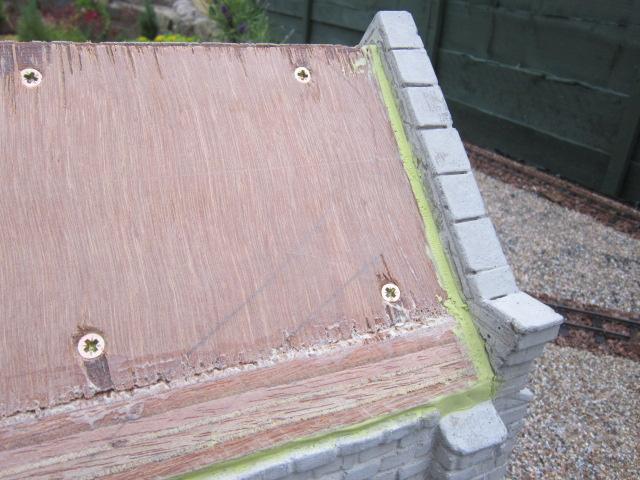

Finally I painted the interior off white and will apply a base coat of exterior paint on the outside tomorrow. This will be a primer to show the mortar lines before picking out individual stones.
More to follow........
Posted: Thu Jul 02, 2015 11:56 am
by Big Al
I like the look off that, a nice engine shed. Amazed you didn't scratch build it in your usual style.