Page 2 of 3
Posted: Thu Jan 02, 2014 11:24 pm
by sstjc
Posted: Fri Jan 03, 2014 8:52 am
by GTB
ikcdab:94786 wrote:
Having made the roof from two layers glued together whilst curved, it is holding its shape a bit better, but i still think is going to need some internal bracing.
I've found when laminating polystyrene sheet for roofs that three layers works much better than two for holding the shape. I also leave them in the forming press for about a week, to make sure they are well and truly set......
My pass car roofs are about 400mm long with three layers of 20 thou. sheet. There is a former every 70mm or so, mainly to make sure the eaves stay straight over time.
A slow solvent also helps when laminating polystyrene sheet. I use Limonene, which is available here in Oz. Microscale, the decal people, sell it under the name Micro Weld in the US and UK.
In small scale work I use Evergreen styrene sheet and strip, which is very nice to work with. Their sheets aren't big enough for large scale work though, so I get 1.4m x 0.7m sheets from a local plastics distributor who supply the sign making trade.
Graeme
Posted: Fri Jan 03, 2014 11:26 am
by sstjc
My method for bending plasticard to make roofs is...
Get a mug or lemonade bottle etc with a tighter curve than needed. For engine roofs I use the mug. Wrap an A4 sheet of paper round it and secure with parcel tape or similar. Then wrap the plasticard round this former and cover with more paper and secure with parcel tape. The point here is so there's no sticky tape on the plasticard or the mug and everything is left clean when you cut away the paper.
Place this whole thing into a bowl, bucket or directly into the sink and boil a kettle full of water. Fill the mug or bottle with this boiling water and then surround the mug/bottle with hot water. Basically just immerse the whole lot inside and out then leave it for as many hours as it takes to completely cool.
Its then a simple matter to cut away all the paper and tape and you should have a formed piece of plastic.
Hope this helps !
Posted: Fri Jan 03, 2014 10:07 pm
by Keith S
I'm always surprised when I see what can be done with polystyrene sheet. It really is like sheet metal in miniature. Nice work so far.
Posted: Sat Jan 04, 2014 9:13 pm
by ikcdab
Today's update. My Criccieth Castle chassis has rather ugly 3mm diameter countersunk holes each end of the buffer beam. I am not sure why they are there as they aren't shown in pics i have seen of the completed Roundhouse engine. Here's the holes on mine:
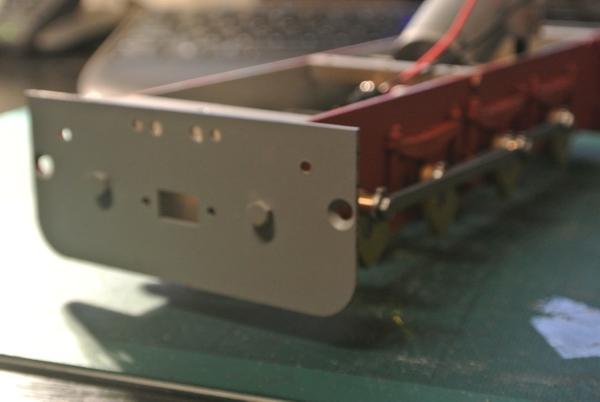
So what to do? i did think of filling them with epoxy or screws or similar, but wasn't convinced. What i have done is to make 4 footsteps out of plasticard which each have a 3mm peg on the reverse to locate in the hole. I have covered the footsteps with home made chequer plate. These look rather like plastic bookshelf supports one might get from Ikea - but i can guarantee i have made these:

And here they are trial fitted to the buffer beam:

I spent most of yesterday making fittings such as cab handrails and lamp brackets etc. Christmas holidays are now rapidly running out as it's back to work Monday. What have i got left to do:
Cab glazing - i have a plan for this...
finish interior cab fittings
fuel filler (its mostly made)
some more strapping and rivet detail
a few more twiddly bits as the fancy takes me.
And then painting. Won't be finished this week, but maybe next weekend will see more progress.
I have connected up batteries and it does run, but i havent yet put in a speed controller.
Further update tomorrow.....
Re: Christmas project - a new diesel
Posted: Sun Jan 05, 2014 8:51 am
by astropsidings
ikcdab:94704 wrote:
I am struggling with which radio control gear to go with.
I am quite taken with the Deltang kit and he now has an ESC which will handle 3 amp which is what i need, but have also seen the Viper unit and associated tx and rx.
Any advice on this would be useful!
Hopefully will post more progress over next few days.....
I now have Deltang RC in my IP 7/8ths Ruston and my 7/8ths Accucraft Baguley conversion, and they run smoothly and absolutely silently. Control is as good as well set up DCC. The small size of the ESC is another advantage. A Viper and a couple of Brian Jones ESC's surplus to requirements now......
Ian
Posted: Sun Jan 05, 2014 9:08 am
by ikcdab
Thanks for the info on RC. Which model deltangs do you have?
I believe the buhler motor I have draws 2.5 amps meaning I need to use the rx65 which I think is a combined RX and ESC.
Posted: Mon Jan 06, 2014 11:09 am
by astropsidings
I have a Deltang TX22 transmitter and RX60-22 rx/ESC is in two of my locos but will now use the higher rated RX65-22. I have recently fitted an RX65-22 in a Friog Harlech Castle for someone else, which is working successfully.
Ian
Posted: Mon Jan 06, 2014 12:30 pm
by Johnnie2sheds
Another vote for Deltang here. Tx22 + Rx61-22 (or Rx65-22) going in all my stuff when I can afford it. One controller for 12 locos. No glitching: excellent..
Posted: Tue Jan 07, 2014 10:21 pm
by ikcdab
Many thanks to all for the RC advice - Deltang it is then.
This evenings update
Posted: Tue Jan 07, 2014 10:26 pm
by ikcdab
Here is where I am now up to. Pretty well complete - only things outstanding are glazing and painting.
Seen here is the engine is bare plasticard with various fittings - sandboxes, windscreen wipers, handles for nose doors etc alongside waiting fitting when painted. Also i need to decide how to fix the cab roof down- the curve isnt quite enough yet. I may try a little gently reheating....
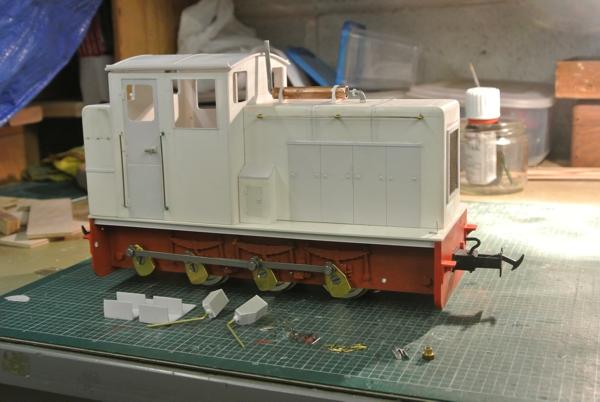
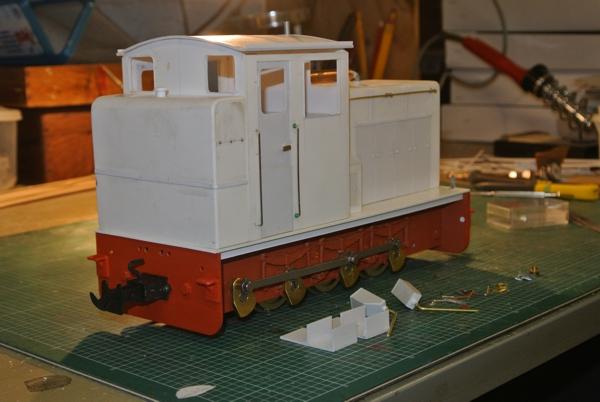
I now need to go to Halfords to get some paint - it wont be for a couple of days, but hope to see further progress by the weekend!
Posted: Tue Jan 07, 2014 11:08 pm
by Peter Butler
Excellent work, looks sturdy and well detailed. I do like to see plasticard used in this way. When it is painted no one would know what it is made from.
Posted: Tue Jan 07, 2014 11:50 pm
by Keith S
It looks great- is it a model of a particular engine, or is it freelance? It certainly looks like a real one.
Posted: Thu Jan 09, 2014 10:50 pm
by ikcdab
Keith S:95140 wrote:It looks great- is it a model of a particular engine, or is it freelance? It certainly looks like a real one.
Thanks - its freelance, but inspired by a standard gauge Andrew Barclay diesel shunter - see a post on page 1 where i posted a link to the photo which kicked it all off!
Posted: Thu Jan 09, 2014 11:45 pm
by Mattyrallye
Super job pal. What colour you choosing?? Halfrauds paint is by far the best you can buy from a local retailer.
They have just introduced a range of varnishes including satin, gloss and Matt. They are pretty good to be fair. Just used the Matt varnish and it was pretty decent.
Posted: Fri Jan 10, 2014 10:46 pm
by ikcdab
Mattyrallye:95287 wrote:Super job pal. What colour you choosing?? Halfrauds paint is by far the best you can buy from a local retailer.
They have just introduced a range of varnishes including satin, gloss and Matt. They are pretty good to be fair. Just used the Matt varnish and it was pretty decent.
prob be dark green - have bought Vauxhall pine green. Red frames etc.
The satin varnished sound useful....
Posted: Fri Jan 10, 2014 10:49 pm
by Mattyrallye
That (even though it reminds me of rude boy corsa's) is actually a good colour for a diesel.

Posted: Sat Jan 11, 2014 12:48 am
by Keith S
ikcdab:95282 wrote:Keith S:95140 wrote:It looks great- is it a model of a particular engine, or is it freelance? It certainly looks like a real one.
Thanks - its freelance, but inspired by a standard gauge Andrew Barclay diesel shunter - see a post on page 1 where i posted a link to the photo which kicked it all off!
Aha, I missed that post. I like yours better than the actual Barclay. The body looks very well-proportioned on the Cricceith Castle chassis. Nice work there. I'm always impressed with the ability of plasikard to replicate metal structures.
And now its finally finished....
Posted: Sun Apr 20, 2014 7:06 pm
by ikcdab
Didnt quite complete the project at Christmas and then work intervened, but keeping up the 'holiday' theme, I have used Easter to finish off the little beast. Here it is. All complete with Deltang RX65 radio control gear - highly recommended!
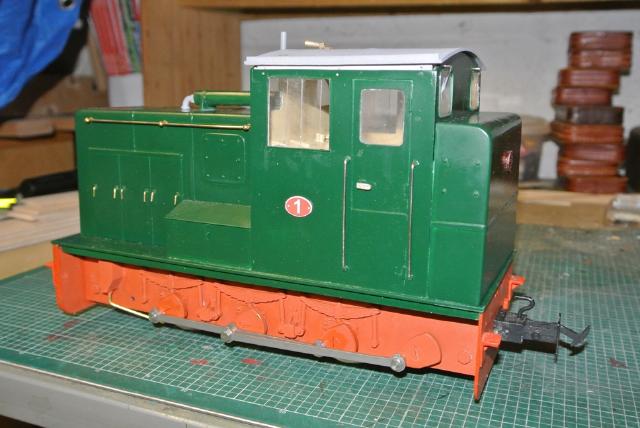

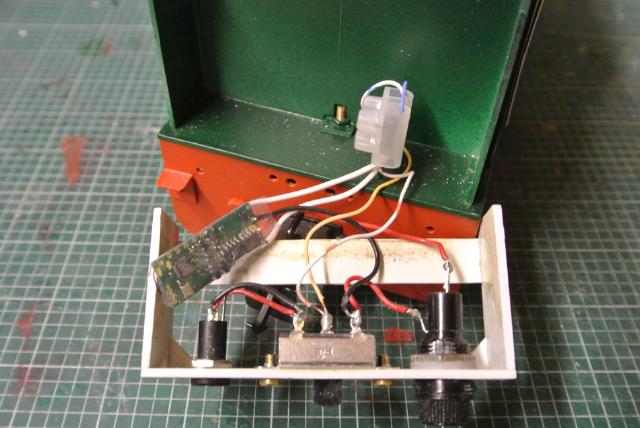
This shows the Deltang combined ESC and RX on the left. I have wired a DPDT switch so that the batteries are either connected to the ESC via a fuse (right) or to a charging socket (left). Should all be clear!
Power is 8 x AA rechargeable cells, mounted in the bonnet.
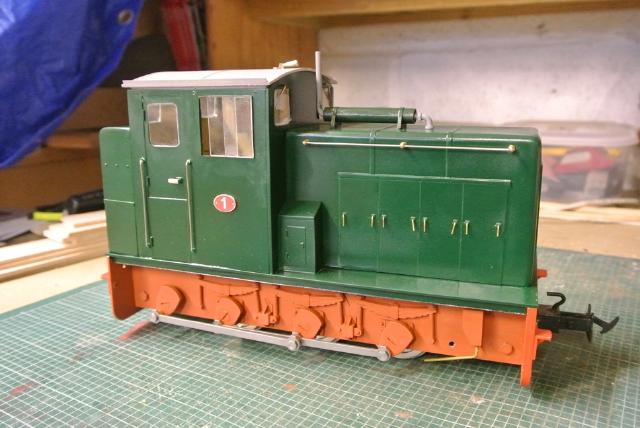


I dont yet have a garden line - it is just beginning construction, so all the loco has done is run up and down the kitchen worktop. So just now need a volunteer to let me run it!
Posted: Sun Apr 20, 2014 8:23 pm
by Dannypenguin
Now I like that A LOT

Great work!