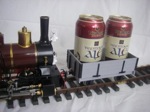
Roundhouse 'Billy' with Simply 7/8ths 'Henry' Bodykit

What is your latest project?
robbieg96

Post by robbieg96 » Tue Jun 25, 2013 12:28 pm

Cheers guys for all your nice comments.

Unfortunately I don't know if a Katie boiler fits the Billy frames and smoke-box, if it does then you have and option for a different bolier layout.
It all really depends if you like the boiler mounted sandbox and the combined dome/safety valve wich the Billy has.

Interestingly Sabre Steam used to use this kit for there Annabel coal fired loco, which is where i first saw it in Garden Rail.

Anyway, the body has had a few coats of paint, and I am currently painting the inside of the cab. I have gone for un-lined satin black, as this will go with all of my stock, and look equally at home on passenger or industrial trains.

Image
- Posed outside Woodside Yard in the sunshine. The whistle and window frames are still masked off for painting. Still pipes on the vac brake pump to fit. The lubricator is currently removed to make fitting easier.

Lner fan Sam

Post by Lner fan Sam » Tue Jun 25, 2013 5:41 pm

That looks superb! :D

Mattyrallye

Post by Mattyrallye » Tue Jun 25, 2013 5:55 pm

That does look very very nice I have to admit. I can't wait for my billy body kit to arrive now!! Thanks for posting up a final pic.

robbieg96

Post by robbieg96 » Mon Jul 08, 2013 8:31 am

Morning All,

Had a very successful test run with the new loco on Saturday. Here are some pictures-

Image
Image
Image


Hope everyone enjoyed the weekend!
-Rob

Mattyrallye

Post by Mattyrallye » Sun Jul 14, 2013 5:59 pm

Looks blooming beautiful.

How did you get on silver soldering the body up? Did you use/recommend any particular brands of kit for the soldering?

Mine turned up in the post yesterday (had my eye on these for a while) and i would love to make as good'a job of it as you have.

any help appreciated

cheers

matt

User avatar
Keith S
Driver
Driver
Posts: 1668
Joined: Thu Feb 24, 2011 11:44 pm
Location: Canada

Post by Keith S » Mon Jul 15, 2013 6:18 pm

That looks very nice indeed. I do wish I had known about this body kit when I was building my "Billy" kit. I like the original cab well enough not to change it now but I like this one better!

I've seen some people put a rounded "Lady Anne" dome on Billys. I think they need a hole drilled in the top for the safety valve. However, I think your dome looks very good, along with the smokebox it gives the whole engine a Barclay/"Tom Rolt" sort of appearance which I like very much. Good job!

User avatar
Gremlin
Trainee Driver
Trainee Driver
Posts: 695
Joined: Sun Feb 08, 2009 2:46 pm
Location: Kent

Post by Gremlin » Mon Jul 15, 2013 6:55 pm

That's turned out very well indeed, looks very workman like

robbieg96

Post by robbieg96 » Mon Jul 15, 2013 9:22 pm

Thanks guys for your comments, i am really pleased with the results.

Matt-
Soldering was ok, it just takes a bit of practice!
All the kit i got from ebay, i use a Weller 80w soldering iron with a large tip, Multicore Size 10 Ersin Solder (60/80 Alloy) and Fluxite soldering paste-

http://www.ebay.co.uk/itm/Weller-SP80L- ... 336d3d9a30
http://www.ebay.co.uk/itm/Multicore-Siz ... 564a734fa5
http://www.ebay.co.uk/itm/Fluxite-Tin-S ... 4174c353ec

The brass components of the kit are easy to fit together using the half etched lines.
Holding the two parts to be soldered together using clamps, with scrap plywood wood inbetween the brass and clamp for protection and to stop the plastic clamps melting (i use those classic black and orange Rolson clamps).
Smear some flux paste along the join you wish to solder. I used a cotton bud for this.
Make sure the tip of the iron is clean- i did this by giving it a gentle file to remove any muck and solder form the previous session. (i have over filed this, so will need a new tip. Newby error i think!).
Once the iron is hot, quickly dab it in the fluxite and then tin the end of the iron with some solder. Once there is some solder on the end of the iron, place the iron on the work and allow it to get hot. The solder should then flow from the tip of the iron and into the join.

It just takes a bit of practice, so use some scrap brass and have a go.

If you want the rivet detail, then apply this first. I used a dulled centre punch and pressed the half etch rivets out from behind on a mousemat.

Hope this helps! There are a few soldering tutorials on YouTube which may be worth a search.

-Rob

Mattyrallye

Post by Mattyrallye » Sat Jul 20, 2013 12:57 am

Rob.

Thanks for the advice this is most useful for future projects.

I have gone down the route of silver solder. And to be honest it hasn't gone well.... At all. As in I will have to buy another kit. Very expensive mistake. But you live and learn just means I will not have a loco for another couple of months to recoup the saving to get another.

I just can't seem to get the solder right at all. Even tries with an iron and I didn't get it to work. :(

Might have to cheat and get the chap at mikes models to build it for me then I will paint etc.

Damn n blast!!


Matt

Big Jim

Post by Big Jim » Thu Dec 05, 2013 12:07 am

Matt.
I don't know if this will help but there are ways of removing excess solder and cleaning the metal down again.
Desoldering braid is available in various thicknesses. Just place it on the solder to be removed and heat with the iron.
It takes a little work but I have salvaged a few badly put together 2nd hand 7mm kits in this way.
Solder suckers can also work well
I have also on larger models had a bit of success using a pencil torch to melt the solder and then blowing it alway with compressed air.
Please note this is bloody dangerous and bloody stupid as you end up with molten metal flying around
Don't do it inside and take all safety precautions, better still don't do it.

I apologise if you have already tried the above and if I am attempting to teach yer granny to suck eggs.

Don't be too sure you have ruined a kit, you might be surprised what can be salvaged.
Last edited by Big Jim on Thu Dec 05, 2013 12:14 am, edited 1 time in total.

Big Jim

Post by Big Jim » Thu Dec 05, 2013 12:09 am

I will just say that again.
Please note this is bloody dangerous and bloody stupid as you end up with molten metal flying around

kandnwlr

Post by kandnwlr » Sun Mar 23, 2014 6:01 pm

That´s one nice looking engine, with a substantial personality, at least in the photos. Looking forward to more pics as things progress.

Post Reply

Who is online

Users browsing this forum: No registered users and 21 guests