
Prototype History
I grew up on the Goldfields near Bendigo in Central Victoria and this project has a tenuous connection with the area. Bendigo had one of the few steam powered street tramways in Aust. and the only one in Victoria, thanks largely to the members of the local council collectively being far from the sharpest tools in the shed. Around 1890 a company was formed to build a street tram between the City of Bendigo (at the time named Sandhurst) and the nearby Borough of Eaglehawk. The Sandhurst Council decided it didn't want it's fair city sullied by overhead wires and forced the company to use battery trams, built in the UK to a Belgian patent. These were an abject failure, as the battery and electrical technology of the time wasn't up to the local geography.
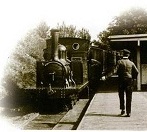
The tramway company quickly went broke and a new company formed to take over the system. Bendigo Council was still adamant about no electric trams, so the new company bought five Baldwin steam dummies and converted the battery trams to trailers. This photo shows a Bendigo Tramway Co. Ltd. steam tram waiting at the Bendigo railway station entrance for it's next run to Eaglehawk sometime in the early 1890's.
- Bendigo Steam Tram-1.jpg (114.3 KiB) Viewed 16420 times
My grandfather could remember these steam trams from when he was a schoolboy and had stories about them. They were a good example of being careful what you wish for, as the anti-electric tram council now found itself with smoke belching steam dummies chugging through the city centre, leaving a trail of sparks and embers behind them, as they were often wood fired. After about twelve years a new company took over with a plan to build a power station and introduce electric street lighting and electric trams. The steam trams were sold off after the system had been upgraded in 1903 to running electric trams. The electric trams were eventually taken over by the State Govt. and were still operating when I was growing up. True to form, the Council kicked up a stink when the Govt. decided to close the system, even though their grandfathers hadn't wanted them. Part of the system still survives as a successful tourist tramway.
After about 12 years service on the Bendigo trams, the five little Baldwins and the three larger Phoenix Foundry built steam dummies were sold off and ended up in industrial service across Victoria and Tasmania, mostly on timber trams. One even ended up in northern Queensland working for a harbour board.
Two were bought in 1908 by Hayden Bros. of Barwon Downs for their timber tramway on the eastern side of the Otways to replace horse haulage. These two were converted into one working loco, including conversion from the standard gauge used in Bendigo to the 3'6" gauge used by the Haydens by an engineering firm in Geelong. What was left of the second loco was kept as a source of spares. The little loco ran until the timber tramway was closed in 1917 and was then sold, ending up with the SR&WSC on various water supply projects until it was scrapped in the '30s after completion of the Hume Weir project.
Which bring us finally to the point of this story.......

The Build
The model was built using an Accucraft Ruby kit. The kit was one of the latest batch and cost all of A$750. Argyle Loco is local to me and I was able to pick it up from Michael at the Sandown Exhibition in early March.
I picked it up on the Saturday and started assembly on the Sunday. The kit went together easily and was ready for an air test the same day. Being a prepainted kit, I ran a tap through all the holes to clean any paint out of the thread and there were no problems fitting any of the screws. This was also only the second model loco I've ever assembled where I didn't have to remove any binding to get the chassis to run nicely. The last time that happened was 50 years ago and the kit was a Tri-ang CKD Princess kit........ The pic. shows the assembled chassis ready for testing on air.
- Hayden-1.jpg (101.49 KiB) Viewed 16420 times
By close of play on the Monday, the loco was ready for a steam test. The test went OK, but I found that the water ran out well before the gas, contrary to what the manual said. The burner wasn't particularly efficient at boiling water and struggled to maintain pressure. It was also noisy and difficult to light, so a new burner of the Roundhouse type was added to the to-do list as well as some work on the smokebox to free up the gas exhaust path a bit. The gas tank got in the way of the planned bodywork, so it needed replacement and relocating. The pic. shows the loco ready for steam testing.
- Hayden-3.jpg (115.44 KiB) Viewed 16420 times
The next pic. shows the loco after the new burner, gas valve and gas tank had been made and fitted. By this stage it also had the new boiler fittings in place and the reverser had been moved forward a bit to clear the planned bodywork. It should be up on the running board beside the boiler, which is where it was fitted on a Baldwin steam dummy. This wasn't feasible with the Accucraft design, without a lot of modification that wasn't worth the effort. The model turned out to be a real oil thrower and although the original had a stove pipe funnel, I end up fitting a working diamond spark arrestor to intercept the oil, the design being similar to the one I fitted to my Aster Krauss loco.
- Hayden-5.jpg (131.89 KiB) Viewed 16420 times
After a lot of work and new parts, the replacement burner was now much the same efficiency as a Roundhouse one. The loco was now much quieter and the boiler was better at keeping up with the cylinders. Work now started on the bodywork and other bits and pieces and the loco. started looking a bit like the prototype. The pic. shows it with the basic bodywork fitted, as well as new headstocks. The water tanks are at the rear of the cab and what look like side tanks are just side sheets to keep the driver from falling off the running boards.
- Hayden-7.jpg (198.36 KiB) Viewed 16420 times
The next step was the corrugated iron roof that was reminiscent of one on a traction engine. This pic. shows the roof supports and framework before the corrugated iron was fitted.
- Hayden-9.jpg (160.05 KiB) Viewed 16420 times
The big trick was making a corrugated iron roof that was strong enough to not be easily damaged. On rolling stock I use corrugated card stiffened with shellac. This wasn't feasible in this case, so eventually I used the barrel corrugating machine I had built to put corrugations into a sheet of annealed brass shim. Corrugating this was a real saga as the sheet had to be annealed four times during the process and I lost count of how many passes through the machine was needed. Curving it to fit the roof was an anti-climax. The corrugated sheet was stiff enough that it curved nicely through the bending rolls without squashing the corrugations. The next pic. shows the corrugating machine and the roof sheet made with it.
- Hayden-11.jpg (167.22 KiB) Viewed 16420 times
The first of the next two pics. shows the model fitted with the completed roof. The loco was more or less complete by this stage, but a few more cosmetic bits like crossheads, slidebars and motion brackets were added, as well as dummy steam chest covers to hide the countersunk screws that hold the valve chests to the cylinders. This pic. was taken outside on a sunny day, just before I remembered the steam chest covers hadn't been fitted....... The second pic. shows the new covers and a closer view of the added crossheads , etc.
- Hayden-17.jpg (221.3 KiB) Viewed 16420 times
- Hayden-18.jpg (143.96 KiB) Viewed 16420 times
It was now time to break the model down into paintable sub-assemblies and the pic. shows it set out on the bench waiting for the paint shop.
- Hayden-19.jpg (197.43 KiB) Viewed 16420 times
I recently decided to stop using Humbrol enamels and this was the first loco. to be completely painted with Revell enamels. This went much better than recent fights to use Humbrol paint, there was no drying in the airbrush, a much smoother finish and less stress all round........
The following pics. show the model outside in some late autumn sunshine, with the TVT engineer up in the cab on a test run.
- Hayden-20.jpg (203.41 KiB) Viewed 16420 times
- Hayden-21.jpg (201.76 KiB) Viewed 16420 times
The last pic shows the loco. in late afternoon sun with a load of sawn timber, on it's way to the transfer siding at Barwon station where the timber will be loaded into VR broad gauge trucks. The VR for some reason disliked station names with two or more words and although the town was called Barwon Downs, the station name was just Barwon.........
- Hayden-22.jpg (236.61 KiB) Viewed 16420 times
Conclusions
The model had been run in on the bench during the long series of modifications and runs smoothly in both directions when set up, so the valve gear didn't need to be modified. The valve gear design is heavy on steam though and uses about 20% more steam than a similar size RH loco., which means the original burner struggled to make enough steam to maintain boiler pressure when running.
The only prototype info is a couple of photos of the steam dummies in service at Bendigo and a single snapshot of the loco in timber tram service, taken in front of the Hayden's general store in Barwon Downs. The main appearance problem due to using the Accucraft Ruby is the boiler, which is longer than the one fitted to these small Baldwin steam dummies. The smokebox especially, is much longer than the prototype, but modifying this would be difficult. It would be easier to make a new boiler, which kind of defeats the purpose of using the kit. My story is that the loco has been reboilered.
While I don't agree with some of the design philosophy, the kit is very well made. All the parts fit properly and no holes needed elongating. I was particularly impressed with the way the coupling and connecting rods fitted without any binding, straight out of the box. The wheels and cylinders are already painted as well.
Regards,
Graeme